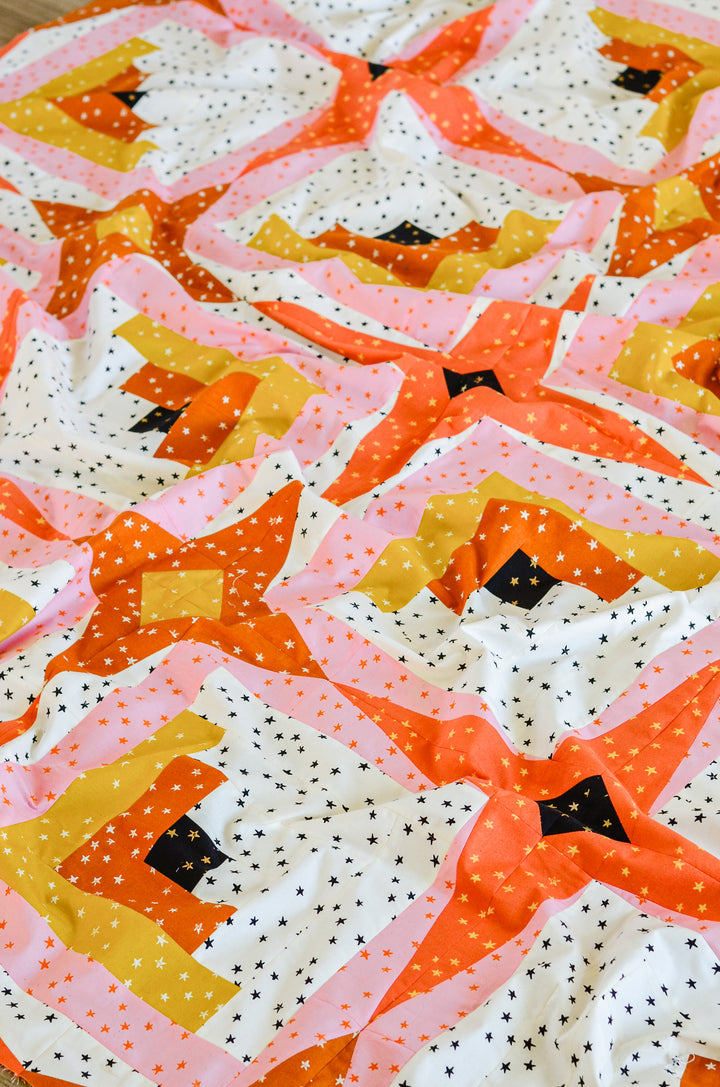
It’s Week 4 of the Sky Cabin SAL and this is a super fun one!
This week, we are diving into sewing Half Rectangle Triangles (HRTs for short). HRT blocks are constructed way differently than HSTs, so it is super important to read through the HRT section of the pattern thoroughly before beginning. And of course, read through this blog after you’ve taken a look at the pattern to get some extra tips!
As a reminder, one lucky quilter will win the grand prize we’ve put together for you all at the end of the sew along. In order to enter your name in the drawing for the grand prize, you will need to post the weekly photo by Sunday night of that week! Make sure your profile is set to “public” and you use the #SkyCabinSAL hashtag so we can see your pretty pictures!
This week, we have TWO prizes to announce!
First up is a $100 gift card to Pasadena Quilt Studio! Pasadena Quilt Studio is run by Jennyth and her shop specializes in solids, artisan prints, and unique fabric bundles and kits. Jennyth actually put together a handful of quilt kits for this SAL! As you can see, she has a fantastic eye for color. This gift card would be pretty great for a Quiltisan fabric bundle, Pasadena exclusive quilt kit, or yardage from her shop!


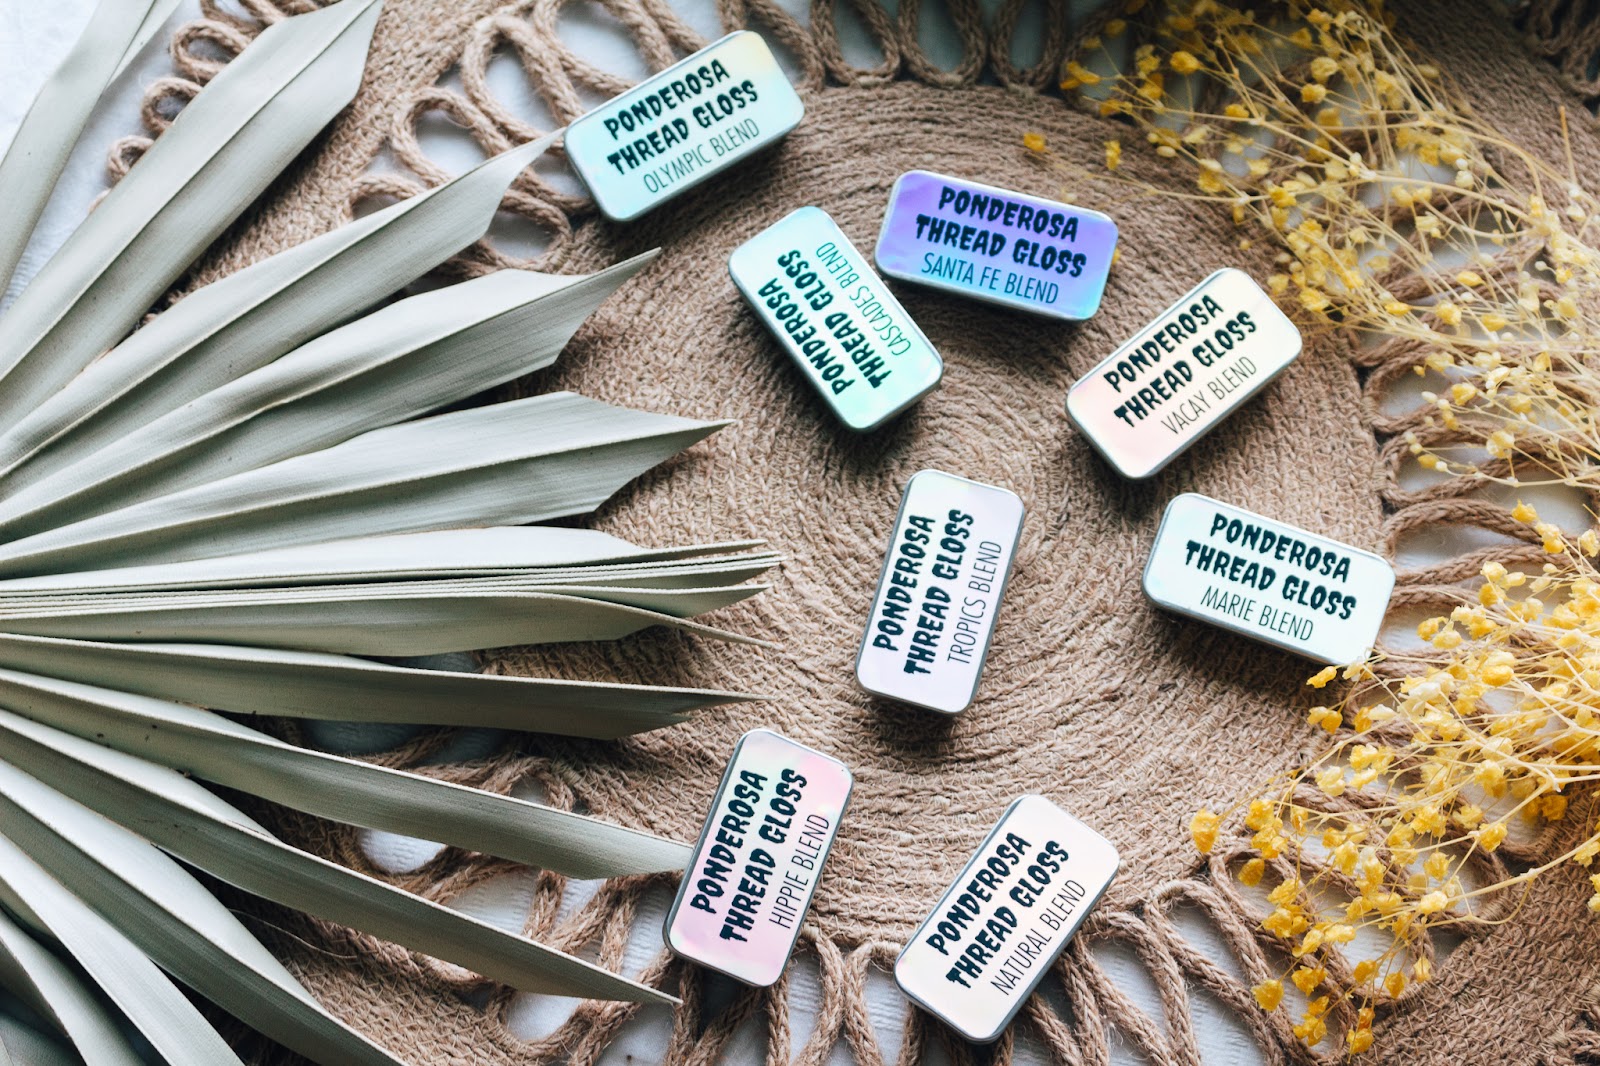
“Have you ever had to cut your thread short in the middle of your groove because there was a gnarly knot? Using thread gloss helps prevent tangles and knots, taking away all of the frustration of handwork. Thread gloss is a specially formulated wax and oil blend that coats your thread to prevent tangles, fraying, and brittleness. Think of it as a deep conditioner for your thread and embroidery floss.”
Sky Cabin Sew Along Schedule
-
Week 1, July 18: Pick fabric
Sponsor: T&S Merch + Patterns! Pick a t-shirt from my shop,
sticker sheet + 2 free T&S patterns! -
Week 2, July 25: Cut Fabric + make log cabin blocks
Sponsor: 14” x 14” Wool Pressing Mat from Project Wool -
Week 3, August 1: Make HSTs
Sponsor: The Mini Project Iron from Oliso -
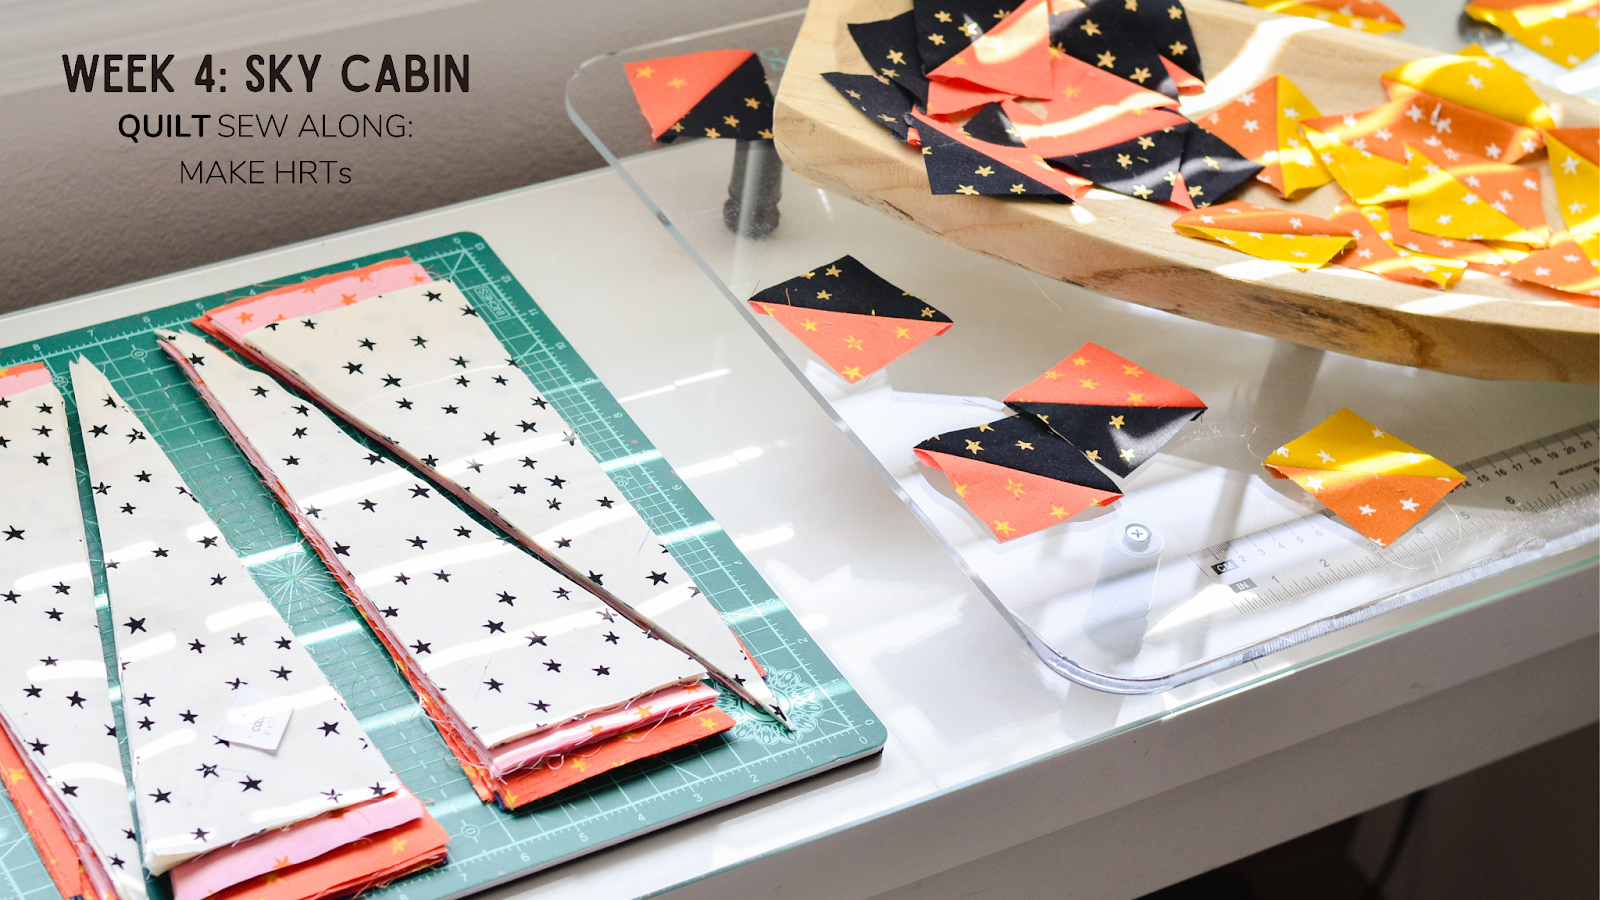
Week 4, August 8: Make HRTs
Sponsor: $100 Pasadena Quilt Studio gift card and
Thread Gloss Grab Bag by Ponderosa Creative -
Week 5, August 15: Construct blocks + finish top!
Sponsor: will be announced Aug 15
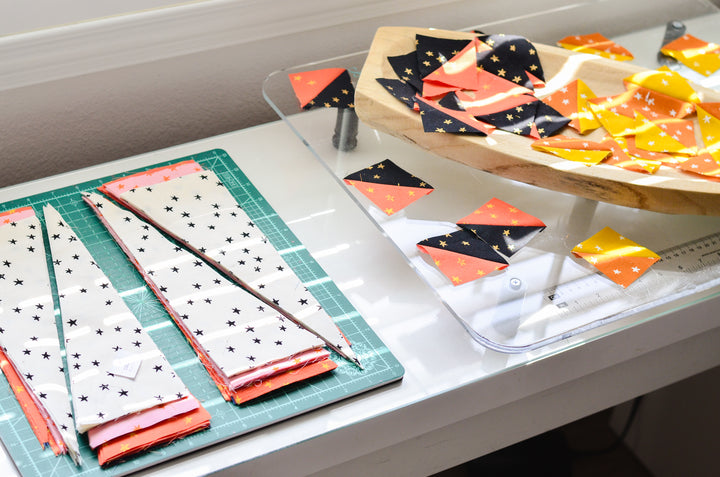
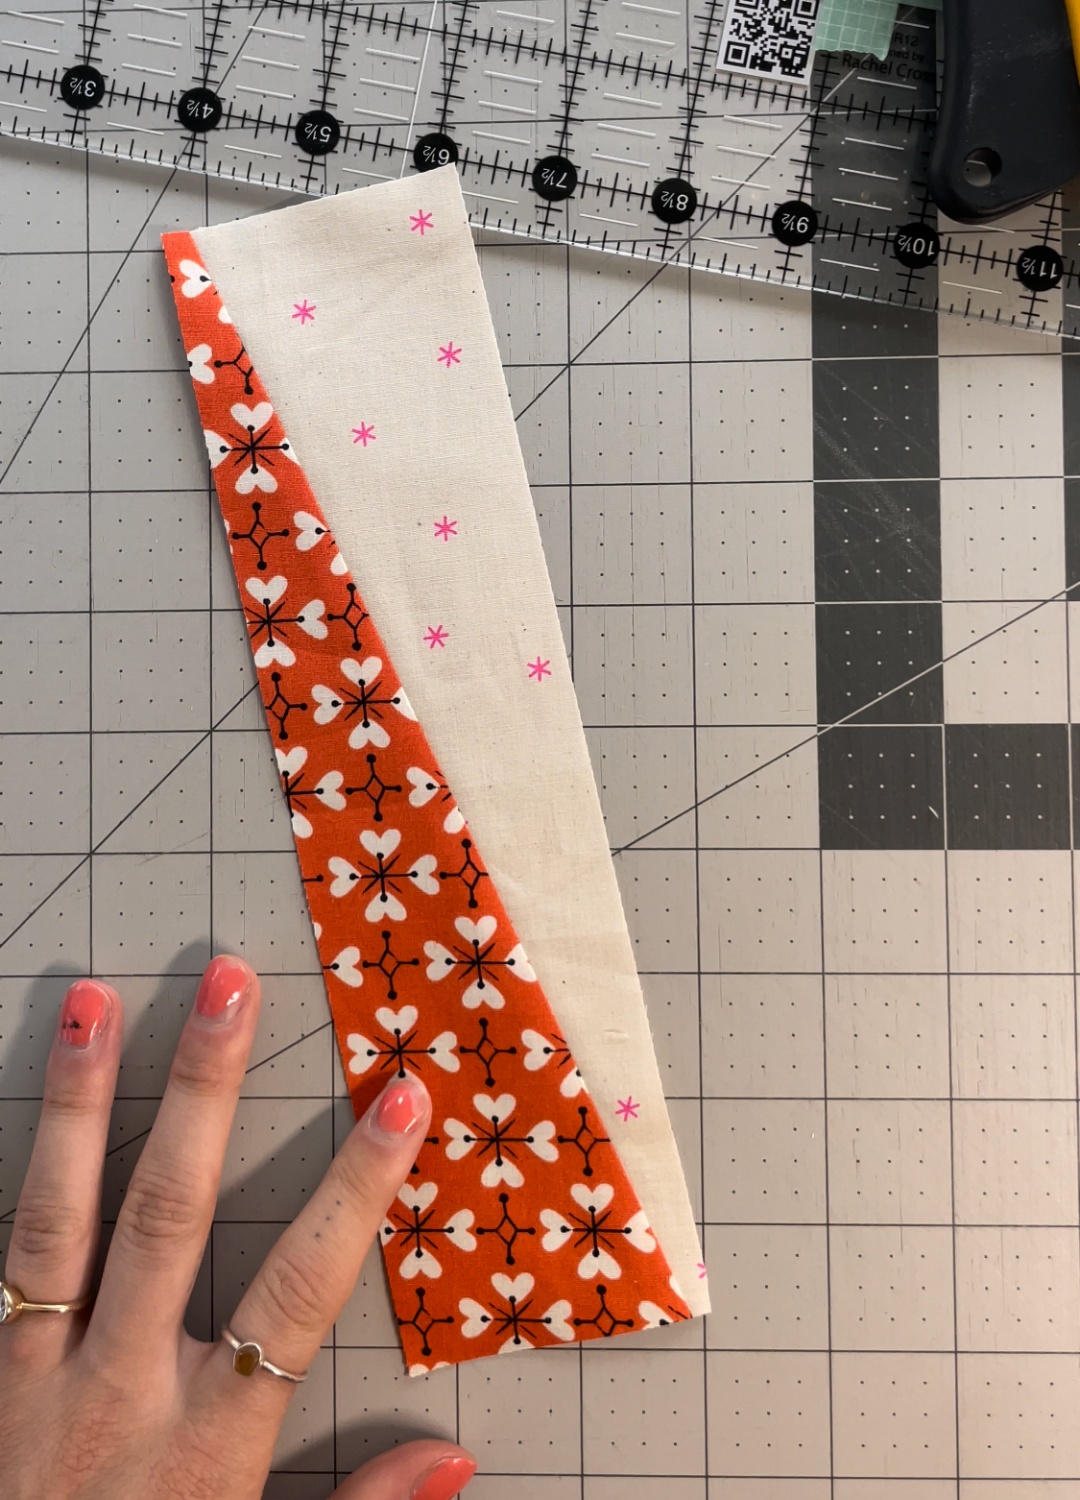
Half Rectangle Triangles
- Read through the entire section before beginning - I know you’ve probably seen this line at the beginning of quilt patterns a million times. It’s easy to skip the reading step when you are really excited to get started on your new quilt. BUT - it is very important to read through and understand what all goes into the HRT blocks before starting! This will help you to avoid excessive frustrations that come from sewing mistakes
- Do a practice run - before you start cutting into your really good fabrics, grab a couple of scraps and run through the instructions once or twice. Once you’ve gotten yourself acquainted with HRTs, you can move onto the real deal!
- Left and right piles - if you are using a print fabric, DO NOT SKIP THIS STEP! This step is required for both the single and the 2-at-a-time methods. You don’t want your pretty prints to be facing the wrong direction after sewing your blocks together. To keep yourself organized, attach a label to the piles to indicate if they are left or right!
-
Cutting with printed fabric - after you’ve made your left/right piles, you’ll move onto cutting. Pay special attention to the direction of your cuts. Because printed fabric is not reversible, you won’t be able to just flip your triangles over if you’ve cut the wrong diagonal. Since the 2-at-a-time method requires that you draw a diagonal line first before sewing and cutting, it can be a little more forgiving (depending on your marking method) if you make a mistake at this step. The direction of the drawn diagonal line is still very much important to pay attention to though! For more information about sewing 2-at-a-time HRTs read this blog post!
-
Lay out all your HRTs before you start sewing together - work on one side at a time to make sure you’re not mixing up the left/right side directions. You should have an even number of left and right HRTs.

-
Use washi tape to mark your ruler before trimming - I have found this to be one of the easiest ways to make trimming more clear and also quicker. For this example, we’re making a 2.5” x 9.5” HRT, so I aligned my washi tape just outside of those ruler marks. This will help lead my eye to the correct dimensions just at a glance!
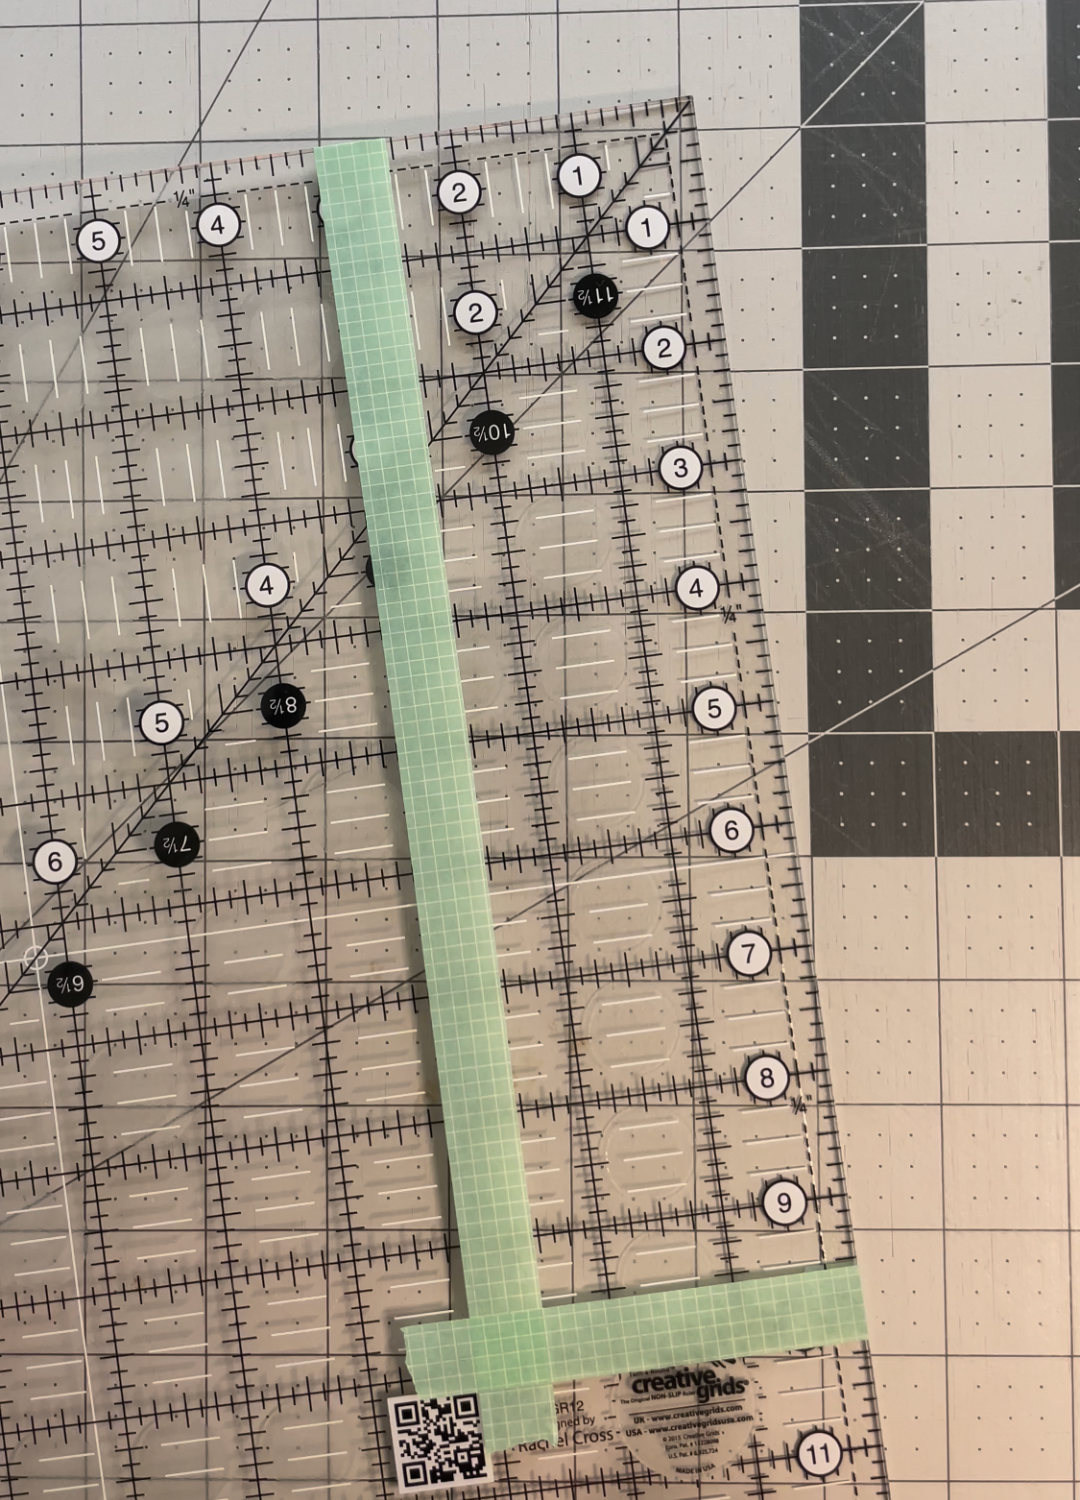
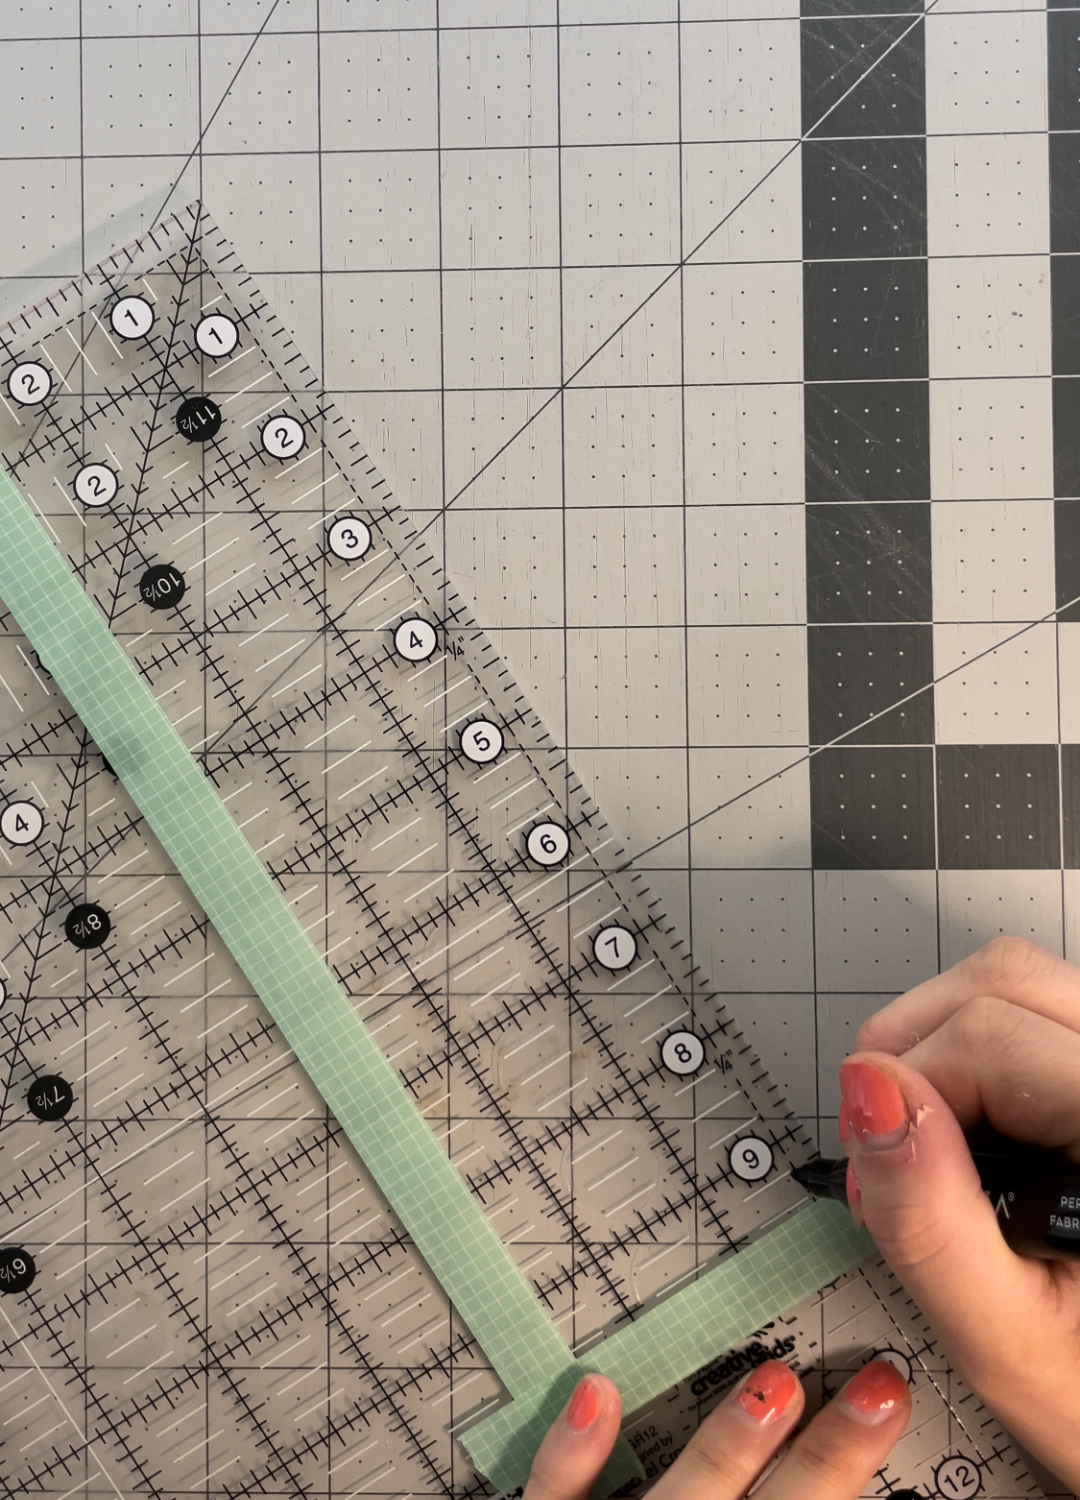
Another way to prep your ruler is to mark a ¼” inside each corner of the trimmed off ruler using a sharpie (use alcohol to remove later). You will want to align your diagonal seam on these dots to ensure you have a ¼” seam allowance while finishing your top. 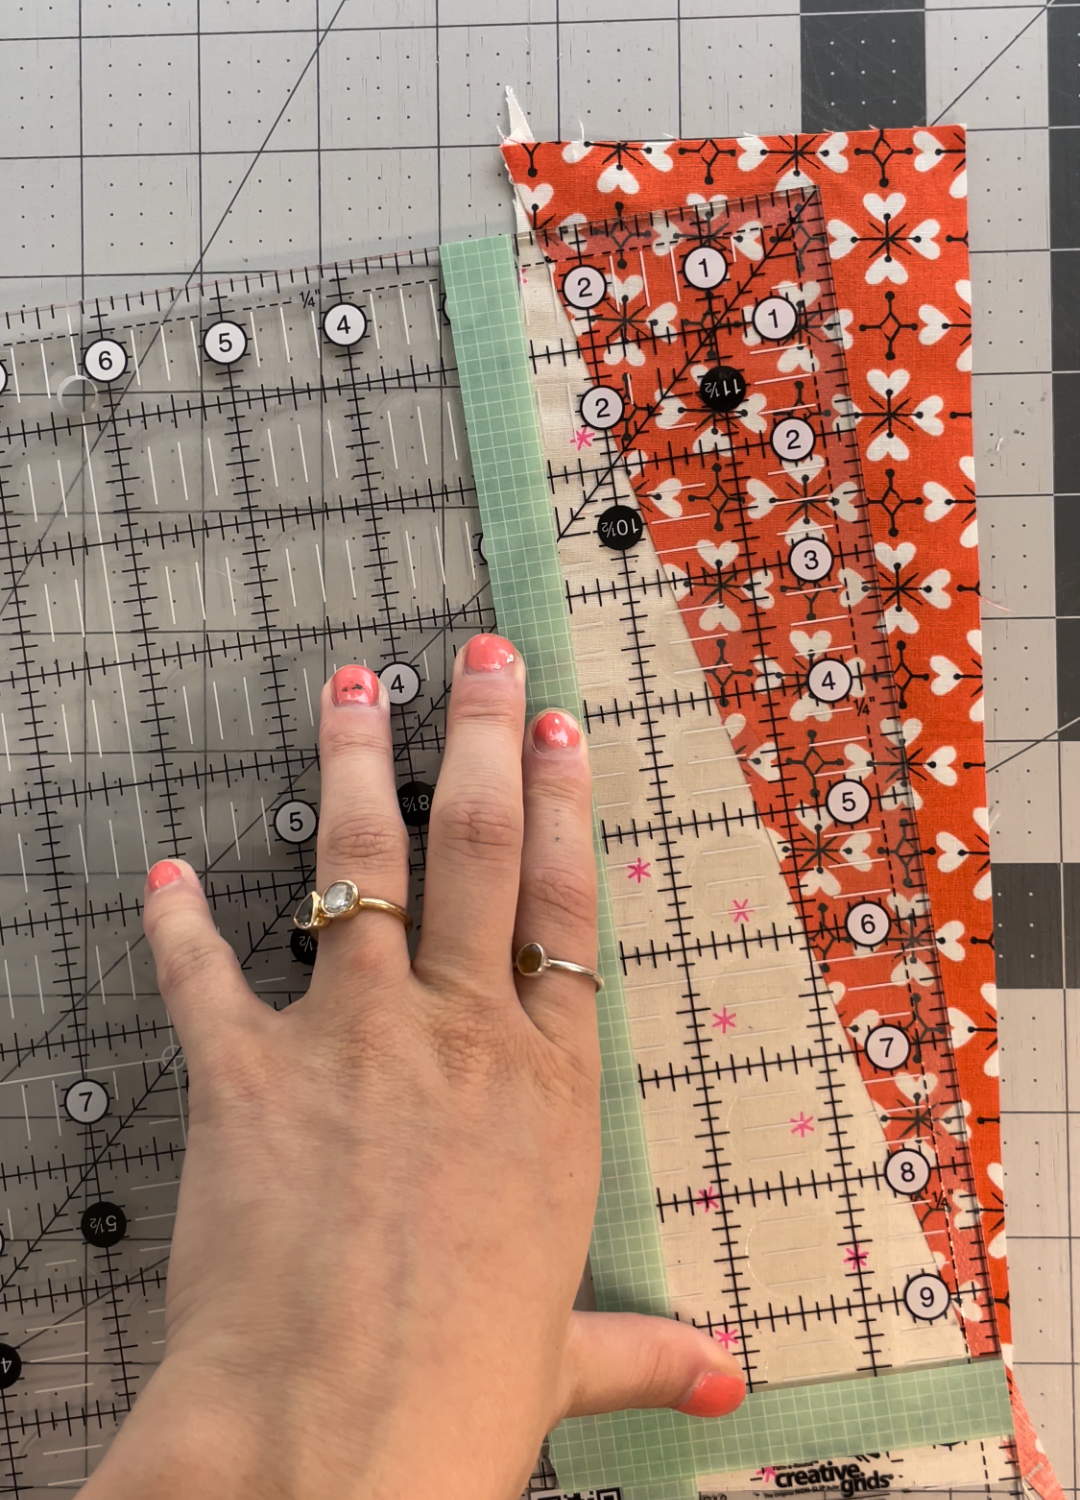
-
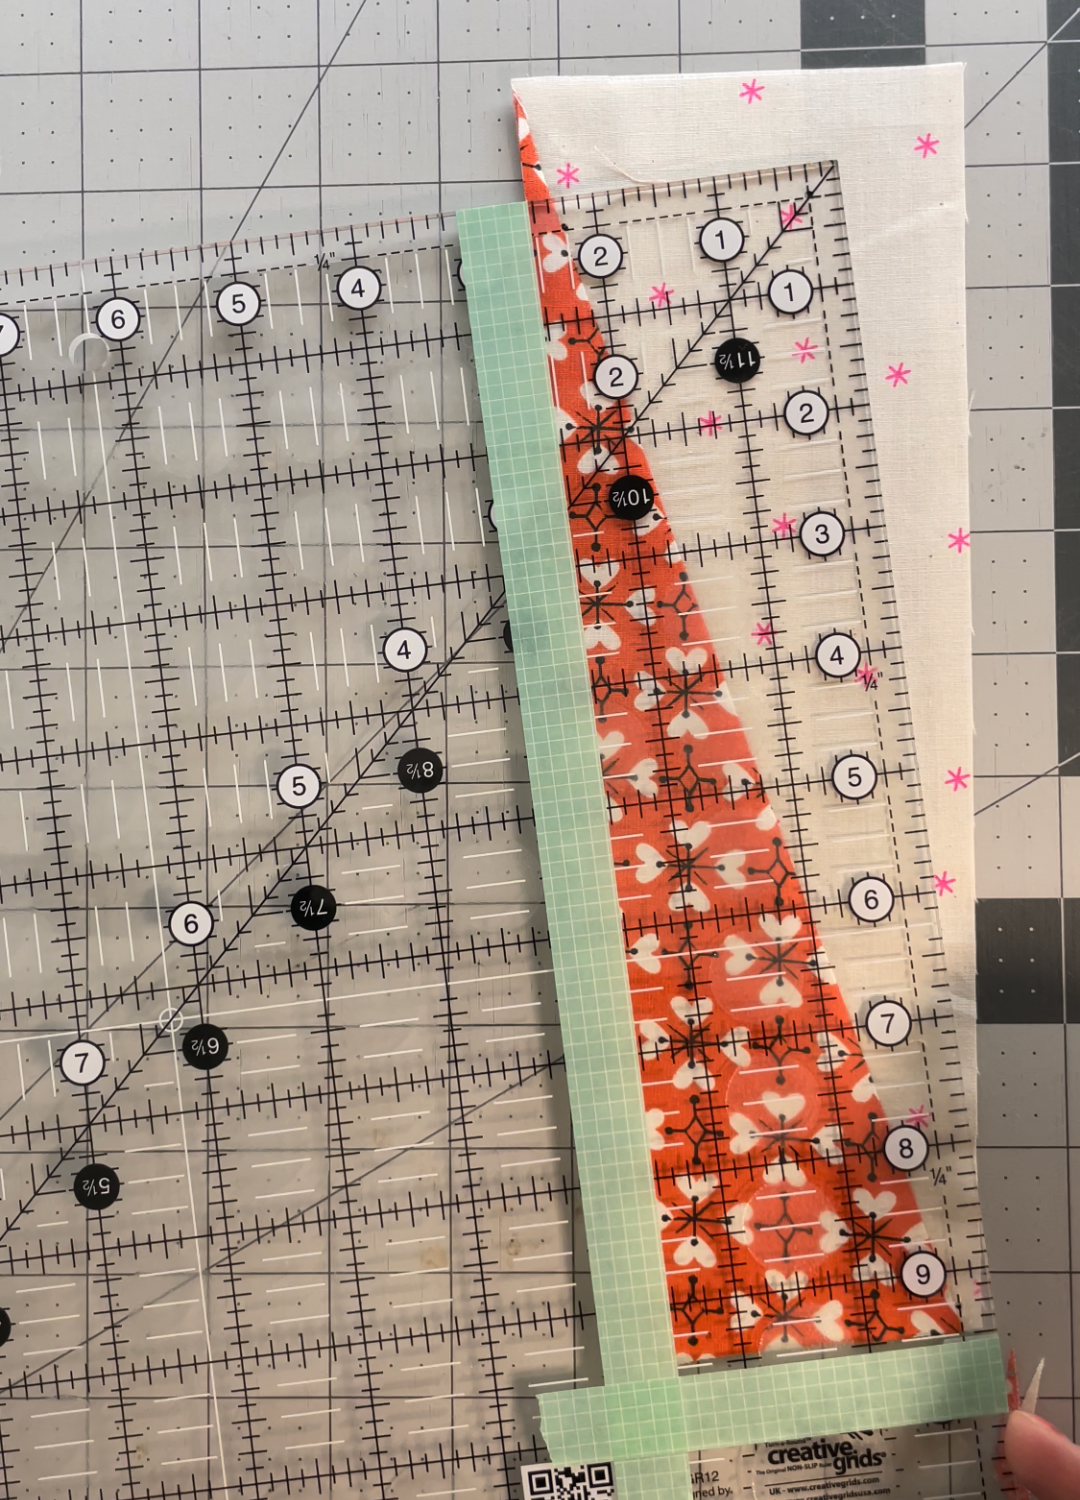
Trust the process - it may look wonky but I promise it’ll all work out. Because of the odd dimensions of these specific HRTs, the trimming angle seems extreme. It may feel like you are trimming off too much or like the guided dots aren’t working. If you follow the steps in the directions, I promise you you’ll see the HRT magic shine through!

Watch the IG live tutorial!